SharkCrate Assembly
How to build a shipping crate in under five minutes
Assembles in Minutes
A lot of people ask, “How do you build a shipping crate?” The best answer is “Use a SharkCrate!”
All of our standard SharkCrates ship and store flat – some refer to these as knockdown or KD crates. However, the SharkCrate system is unlike anything you’ve used before.
Check out this one minute video to see the easiest way to assemble your wood shipping crate from SharkCrates.
I had set aside an hour to put my crate together and it was together within minutes. Kudos on such a great product!
How to secure your SharkCrate – Screws or Pallet Banding?
After nesting all the SharkCrate panels together, you have a finished crate. However, you still need to secure the panels together and to the pallet. Some of our customers use screws and some use metal or poly pallet strapping and some use a combination of both. Below is a quick description of each method. PRO Tip: We use pallet banding when shipping back and forth to our sister company in Germany, BOX.
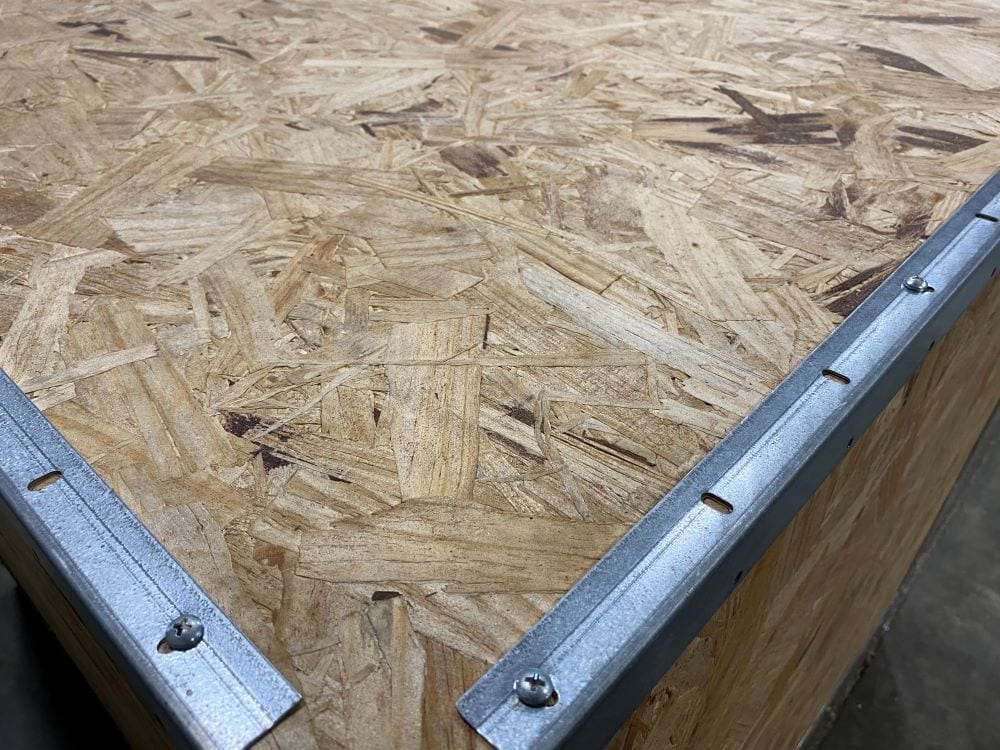
Wood Screws
For small shops that don’t have pallet banding equipment, wood screws are a great alternative. We include a bag of wood screws with all our standard crates and recommend one screw on each end and then every 10″ or 3 eyelets.
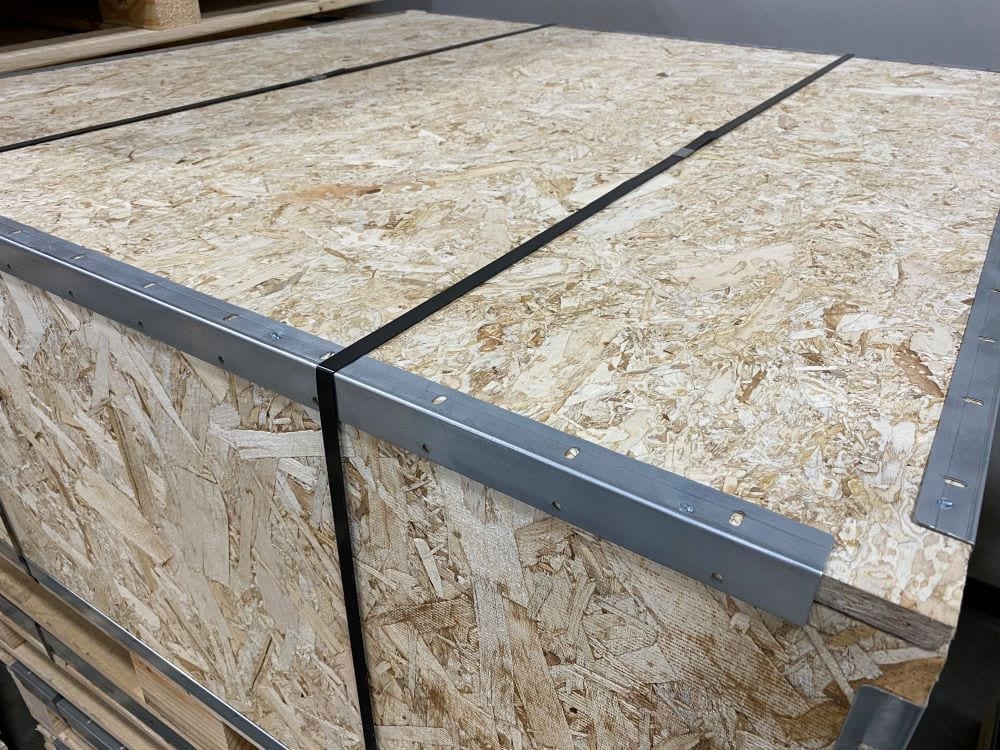
Pallet Banding
Using steel or poly banding to secure your wood crate is the fastest and most secure method. This method also makes it easier for your customer or the end user to quickly disassemble and store the crate. We recommend at least two straps per 4×4 crate.
How to build your wood crate: Step by step instructions
Step 1
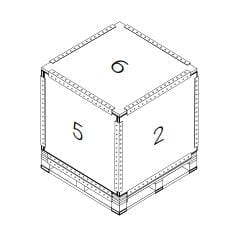
After receiving your SharkCrate, remove the banding and lay the panels out on a level working space.
– Panel 1 – Bottom (with 4 brackets)
– Panels 2 & 4 – Ends (with 2 brackets each)
– Panels 3 & 5 – Sides (no brackets)
– Panel 6 – Top (with 4 brackets)

Step 2
One at a time, place panels 4, 5, and 3 into the brackets
on panel 1 and the adjoining corner brackets, ensuring
that the panels are square and fully inserted into the
brackets.

Step 3
Push panel 2 onto the sides of panel 3 and 5 and slide it carefully down into the bracket on panel 1.

Step 4
Place panel 6 on top of panels 2, 3, 4, and 5. Tip: If you
are having trouble installing the top, make sure that all
other boards are securely seated in their respective
brackets and that your crate is on a level surface.

Step 5
Fully-assembled SharkCrate can be secured to the pallet with metal / poly banding or with the included screws. If using screws, it is recommended that they be placed in the bracket holes approximately every 10″ or 250mm.
SharkCrates makes crating our high-value products almost effortless.
Still don’t believe how easy SharkCrates are to assemble?
This uncut video shows one person fully assembling our 48 x 48 x 48 crate and securing with screws in under 5 minutes.
Some of our customer use screws while other use metal or poly banding. This is really up to the customer as ultimately they need to decide how they are going to use the crates.
Connect